Part 2: Create a new project
In Part 1, you installed everything we’ll need to create a new Jekyll project. With a new Jekyll project, you’ll instantly get the basic elements for your new website.
Start a new project
You will only have to do start a new project once. In the TerminalCommand Prompt, move to a folder where you want to save your website.
For example, you might want to create a new folder called Websites in your existing Documents folder and move into the new folder. These are the commands you’d use:
$ cd Documents
$ mkdir Websites
$ cd Websites> cd Documents
> mkdir Websites
> cd Websites
You can of course create the folder for your Jekyll project somehwere else. Just make sure to use the TerminalCommand Prompt to move into that folder. Once you’re in the right place (remember: you can always check with pwd), run this command:
$ jekyll new my-website> jekyll new my-website
This command is made out of three parts. jekyll lets the TerminalCommand Prompt know that we want to talk to Jekyll. new is the command that tells Jekyll to generate a new project, and my-website is the name of your new project.
For example, if you wanted to create a website about cats versus dogs, you would use the command jekyll new cats-vs-dogs.
Initialize your Jekyll project (just once)
If you installed Jekyll and typed the command to start a new project correctly, you should now have a new folder my-website.
In the TerminalCommand Prompt, make sure to move into the project folder:
$> cd my-websiteOnce you’re in the project folder, run the following command, so the bundler gem we installed in Part 1 can set up a few additional things:
$> bundle installLet the command finish its job and then type:
$> bundle exec jekyll serveOnce you press enter to confirm the command, your Jekyll website should be running on your computer. Next time you’ll want to run Jekyll, you don’t need to use bundle commands, you’ll just be using jekyll serve like described below.
Run Jekyll and visit your website
Once your Jekyll project is all set up, you can just start it up with the command:
$ jekyll serve> jekyll serve
Whenever a Jekyll project is running on your computer, you should see something like this in your TerminalCommand Prompt and you won’t be able to input additional commands:
$ jekyll serve
Configuration file: /Users/codecat/Documents/Websites/my-website/_config.yml
            Source: /Users/codecat/Documents/Websites/my-website
       Destination: /Users/codecat/Documents/Websites/my-website/_site
      Generating...
                    done.
 Auto-regeneration: enabled for '/Users/codecat/Documents/Websites/my-website'
Configuration file: /Users/codecat/Documents/Websites/my-website/_config.yml
    Server address: http://127.0.0.1:4000/
  Server running... press ctrl-c to stop.
> jekyll serve
Configuration file: C:\Users\codecat\Documents\Websites\my-website\_config.yml
Source: C:\Users\codecat\Documents\Websites\my-website
Destination: C:\Users\codecat\Documents\Websites\my-website\_site
Generating...
done.
Auto-regeneration: enabled for 'C:\Users\codecat\Documents\Websites\my-website'
Configuration file: C:\Users\codecat\Documents\Websites\my-website\_config.yml
Server address: http://127.0.0.1:4000/
Server running... press ctrl-c to stop.That’s a lot of words that basically mean one thing: your website is now running on your computer, and you can visit it in your web browser (Chrome, Safari, Firefox etc) on the address http://127.0.0.1:4000/.
Go ahead and visit your website. It doesn’t look like much yet, but congratulations on making a website run on your computer! That’s a pretty important step. Your computer is acting like a web server now, but instead of making the website available to everyone on the internet, the website can only be accessed from your local network on your computer. That’s why we call it a local server.
Stop running the Jekyll server
Let’s also take a look at how you can stop Jekyll from running, which is always a good idea when you finish your work. Go back to the TerminalCommand Prompt and press the Control and C keys (not cmd!) on your keyboard to stop your local server. You might also be asked to confirm the termination. Just type Y and press Enter to confirm.
If you go back to your web browser now and refresh your website, it won’t work anymore. Go back to the TerminalCommand Prompt and run the website again with jekyll serve.
jekyll serve from the TerminalCommand Prompt inside the folder of your Jekyll project (use pwdcd to check whether you're in the right folder if you get any errors).
Get to know your website
In order to edit the website, you’ll need a text editor. You should already have Sublime 2 installed on your computer (if not, go back to Part 1). Once you open Sublime, use the File > Open menu to find and open your project folder.
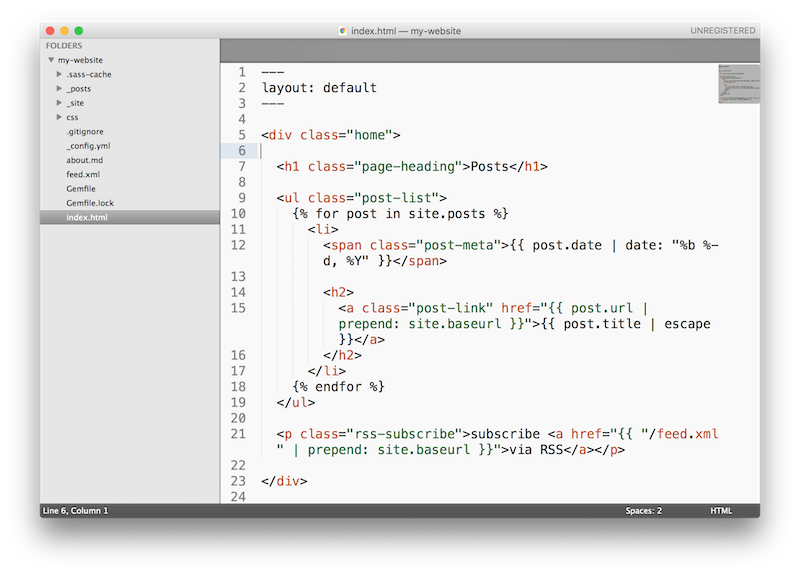
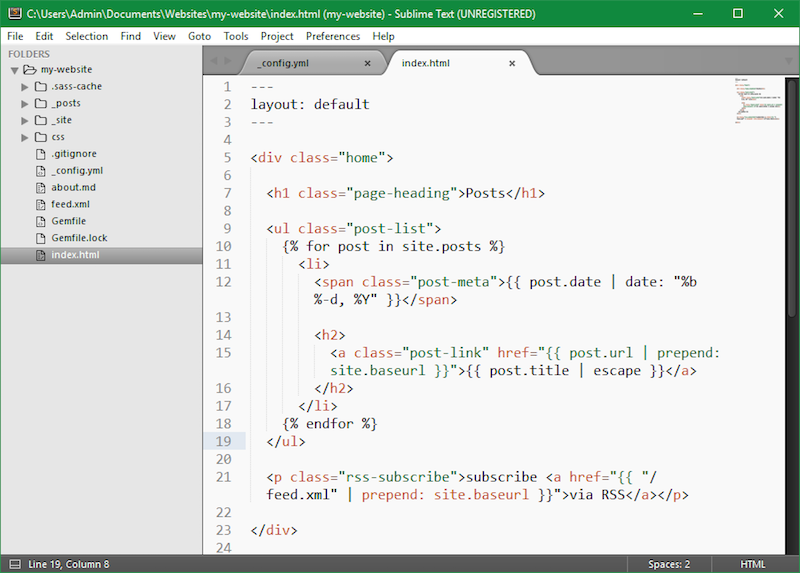
On the left side, you’ll see a list of files and folders in your project. That’s a lot of work Jekyll did for us! Click on file names to see what’s inside and on folder names to reveal their contents.
These are the main folders and files you should see:
_postsfolder: this is where blog posts are stored. Go ahead and click on the post that’s already in the folder. The text is the same as on the “Welcome to Jekyll!” post you can click on your website._sitefolder: this is where Jekyll saves your website when you runjekyll serve. You’ll see a lot of files with familiar names here, but don’t edit them as they are erased and generated again whenever you run your website.cssfolder: this folders is used for files that define the design of the website, written in a language called CSS. We’ll learn more about design and CSS later on._config.ymlfile: this is where the main settings for your website are saved.index.htmlandabout.md: these are the two initial pages Jekyll creates.index.htmlis the first page you see when you open the website, whileabout.mdis the page you see when you click on the About link on the website.
Customize the text on the front page
Let’s start making this website your own. In Sublime, open the _config.yml file in your project, and replace the title, email, and description with your own content.
Make sure to only edit the text after :. The text after the hash sign (#) are comments that won’t be displayed, but can help you understand what each part of the file is for.
For example, this is how Grace edited her _config.yml file:
# Site settings
title: Grace Hoppurr's Lair
email: grace.hoppurr@gmail.com
description: > # this means to ignore newlines until "baseurl:"
  Grace is a Computer Scientist who loves cats. You can find more about her work on this website.
baseurl: "" # the subpath of your site, e.g. /blog
url: "" # the base hostname & protocol for your site
twitter_username: gracehoppurr
github_username:  gracehoppurr

# Build settings
markdown: kramdown
theme: minima
Make sure you also delete http://example.com from the line url: "" because your website doesn’t have a public web address (URL) yet.
Once you add your own text, save the file in Sublime (hint: Cmd + S is the keyboard shortcut for saving files). Usually you can see the changes just by refreshing your website in the web browsers, but you’ve just edited the configuration file with some important settings, so you’ll probably need to stop Jekyll from running (remember: Control + C to stop and then jekyll serve to make it run again). After you do that, refresh your website in the web browser, and you should see your own title, email and description on the website now.
The website should now look something like this:
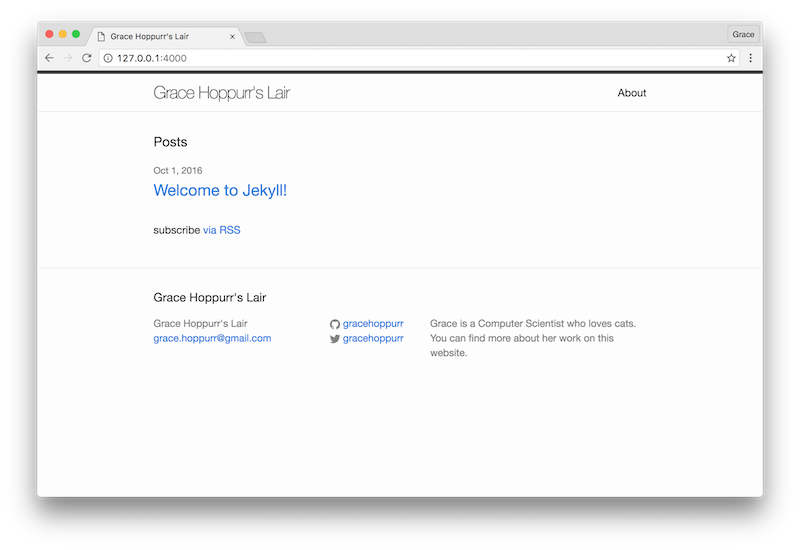
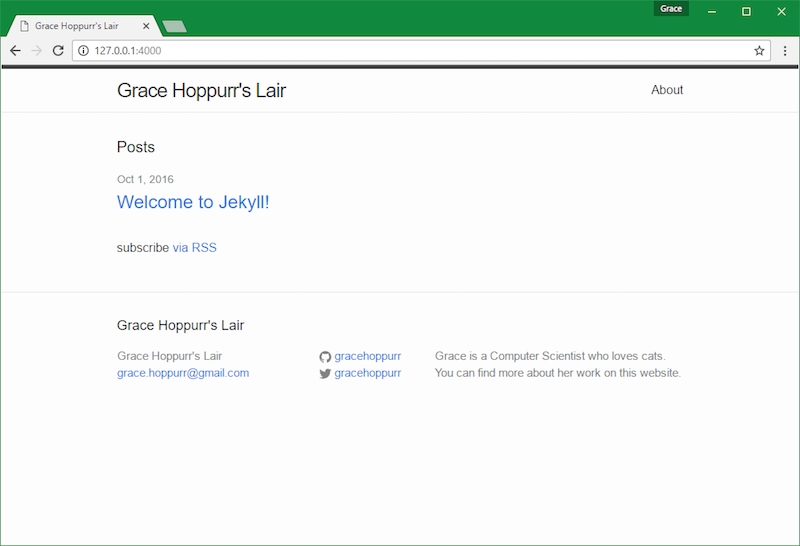
jekyll serve?). If there's anything wrong with the code, the TerminalCommand Prompt will also show you potential errors, so check your TerminalCommand Prompt window whenever the website doesn't load.
What did you learn?
Wow, you have your own website now! You created it by starting a new Jekyll project through the TerminalCommand Prompt (jekyll new my-website) and then running the website with jekyll serve. You were then able to open the website in your web browser, and edit the title, email and description on the front page.
In Part 3, you’ll learn more about editing the content of pages and basics of HTML, the language of the web.