Part 4: Add and edit blog posts
In Part 3, you learned how to edit and add pages. Now we’ll look at editing and adding blog posts, which isn’t all that different.
One folder for all your blog posts
Jekyll creates a blog post from every file in the _posts folder, you just have to make sure they are named and formatted the way Jekyll expects them to be.
In your new project, you will find just one file in your _posts folder. The file will be named something like this: 2016-09-30-welcome-to-jekyll.markdown. The first part of the name will be different to match the date when you created your project.
Create a new blog post
This sample blog posts includes some helpful information about Jekyll, so we’ll leave it as it is for now. It also explains how you can create a new blog post, so let’s start with that.
Create a new file for your blog post
You can duplicate the existing post into a new file (you can use Copy-Paste in FinderWindows Explorer). Just make sure the new file is also placed in the _posts folder. Rename the filename to YYYY-MM-DD-learning-jekyll.markdown, where the YYYY-MM-DD part matches today’s date.
For example, if today were July 29, 1947*, the name of your new blog post file would be 1947-07-29-learning-jekyll.markdown.
* The day ENIAC, the first electric computer, programmed mostly by women, came online
Edit the title, date and other front matter
Now that you have your new blog post file, you also need to update the title, date and other general information about the blog post in the first few lines of the blog post. It’s similar to what you’ve already done when creating a new page.
Right now, your blog post file (_posts/1947-07-29-learning-jekyll.markdown) should start with this:
---
layout: post
title:  "Welcome to Jekyll!"
date:   2015-05-10 16:31:24
categories: jekyll update
---
Change the title, date and category to:
---
layout: post
title:  "Learning Jekyll"
date:   1947-07-29 11:28:00
categories: news
---
Use your current date and time, of course. Save the file and refresh the website in your browser. You should see your new blog post on the Blog page.
jekyll serve and how to visit your website.
Write some content
Well done! But now your new blog post still has the same content as the sample post. Let’s work on that. Delete everything after the second set of --- in your new blog post. Take a few minutes to think about what you’ve learned so far and write some notes that will help you when you’ll be improving your website later on, on your own.
Use your own words and your preferred language to write about how you could use Jekyll for your own projects and write any notes you’ve scribbled on paper during previous parts. You can use this as your learning journal. Don’t rush this part, feel free to take as much time as you need to sort through your thoughts and ask questions about parts that still confuse you.
After you’re done, don’t forget to save the file, reload your website in the browser, and see what you’ve written appear on the page. Good job!
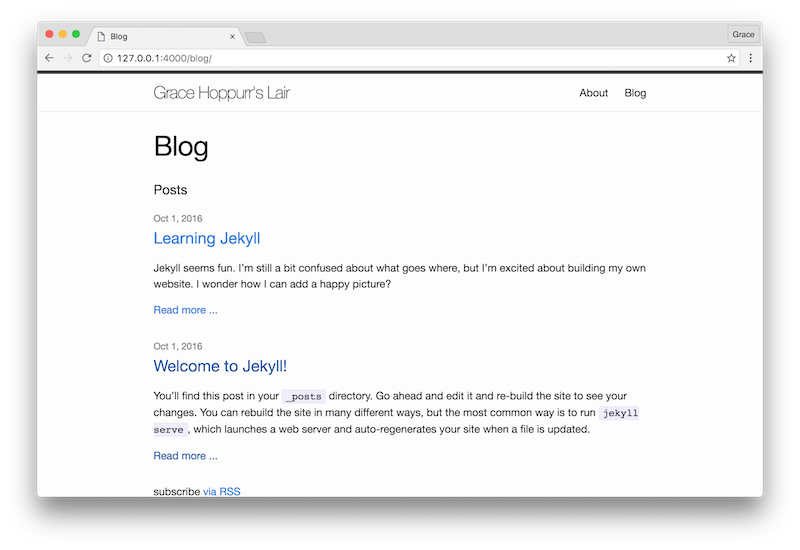
Add post excerpts to your blog page
On your blog page, you can now see the titles of your blog posts. Sometimes, it’s hard to know what a blog post is about just from reading its title. Let’s modify the blog.html page to also include a short excerpt.
In the file blog.html, find the lines that take care of displaying the post titles:
    <h2>
      <a class="post-link" href="{{ post.url | prepend: site.baseurl }}">{{ post.title }}</a>
    </h2>
And add the following line after the line with the closing Heading 2 tag (</h2>):
{{ post.excerpt }}
Save the file and reload the website in your browser. Jekyll will now automatically include the first paragraph of each blog post on the page.
To make sure the readers know there’s more than just the first paragraph to your blog posts, you can also add a “Read more” link after {{ post.excerpt }} like this:
<a href="{{ post.url | prepend: site.baseurl }}">Read more ...</a>
Save, refresh, and test the new link. Pretty cool, right? You can now take a short break, you’ve earned it!
What did you learn?
You now know how to add and write new blog posts on your website. You've already learned how to add new pages, so you can now add any type of content to your website.In Part 5, you’ll learn how to make your website your own by playing with its design.