Part 6: Publish your website online
In Part 5, you made your website much better looking. It looks so good it’s time to share it with the world and send the link to your friends.
At the moment, your awesome website lives on your computer. You can visit it in your web browser after you run it from the TerminalCommand Prompt with jekyll serve. Unfortunately, this doesn’t yet make it available to anyone else. Which is why we’ll now take a look at how you can publish it online with a little help from GitHub.
Create your free GitHub account
GitHub is a website where people from all over the world share and work together on big and small coding projects. In other words, GitHub is a super cool website where you can share your projects for free. This allows other users to learn from your code and even suggest improvements.

A lot of GitHub users are professional programmers, but there are also many people who are just starting to learn coding — just like you. Looking at other people’s code and playing with it on your own computer is a great way to improve your programming skills or find solutions for your coding problems. Just make sure to add attribution if you use other people’s code in your projects!
We also like GitHub because it plays really nice with Jekyll, the tool we’re using to build your website. In fact, GitHub likes Jekyll so much that it allows you to publish your Jekyll projects online for free, through a service called GitHub Pages.
In Part 1, you probably already installed GitHub Desktop on your computer. If not, visit this page to download the app now. And while you’re waiting for the app to download and install, sign up for your own GitHub account (choose the Free plan). If you already have a GitHub account, you can skip this step. Either way, make sure to remember your GitHub username.
Turn your project into a Git repository (just once)
Once you have your GitHub account, open the GitHub Desktop app on your computer. When you do this for the first time, you’ll be asked to log in and set up a few things. Just follow the instructions and on the Configure Git screen, click the Install Command Line Tools button.
After the initial setup up, you’ll find a Tutorial in the app that you can skip for now. We now want to tell the GitHub app to start tracking changes in your project.
But first, let's go back to the Command Prompt for just a second to initialize Git in our project. Make sure you're in the project folder and type:
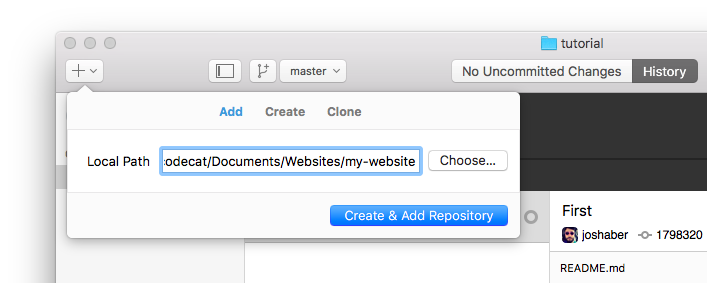
> git initIn the GitHub app, click the + icon in the top left of the app, switch to the Add tab, and add the folder, where your website is saved (for example, Users/codecat/Documents/Websites/my-website). Click on the Create & Add Repository button to confirm your choice. This will add and set up your project folder as a repository, which is just a fancy name for a project.
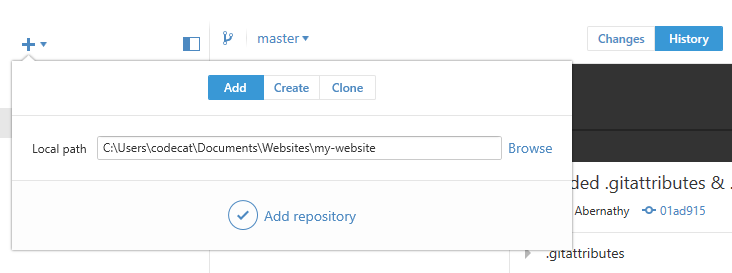
Go back to the GitHub app now, click the + icon in the top left of the app, switch to the Add tab, and add the folder, where your website is saved (for example, C:\Users\codecat\Documents\Websites\my-website). Click on the Add Repository button to confirm your choice. This will add and set up your project folder as a repository, which is just a fancy name for a project.
Your project will now appear in the left sidebar. If you right click on the name, you’ll even get handy shortcuts that open your project online on GitHub (we’ll make that possible in a minute) and on your computer.
Syncing step 1: review and commit your changes
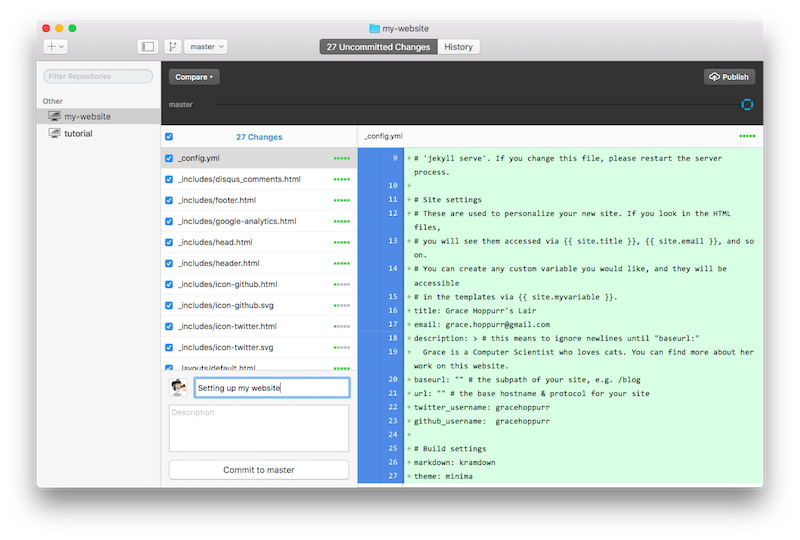
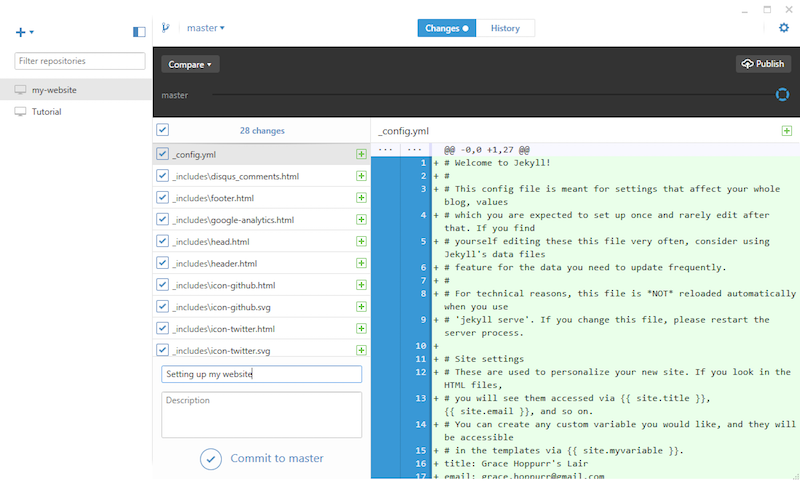
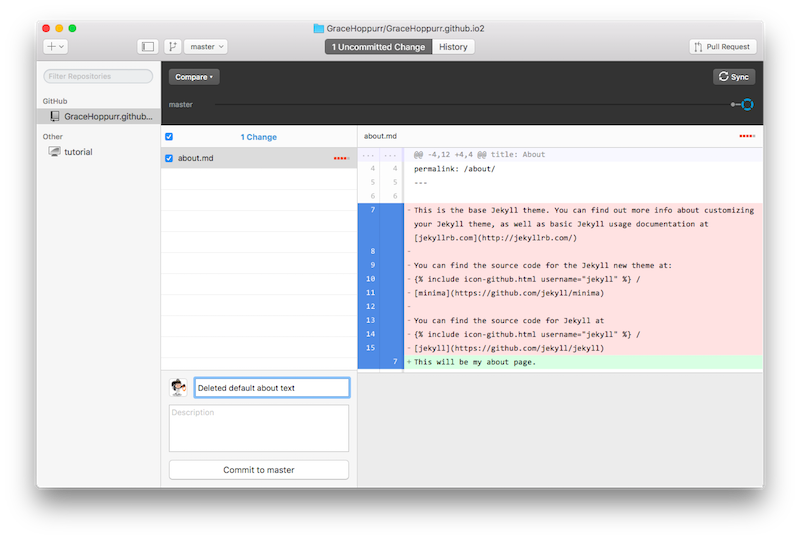
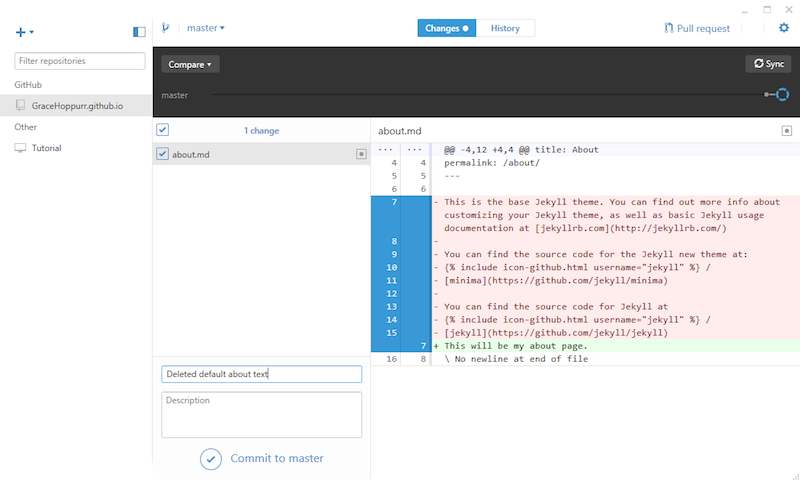
When you select your project now, you’ll see a list of changes since the last commit (save) in the middle column of the app under the Uncommited ChangesChanges section. When you do this for the first time, all your files will appear as changed. By clicking on each of the files, you can review the changes you made in the selected file since the last commit in the right column.
Before you can publish and sync changes, you first have to commit them as a package. It’s good practice to do this every time you make any significant changes to the website (add a new blog post, make design changes etc).
To commit your changes, enter a Summary (a short title) for your commit and optionally a brief description. For your first commit, the title can simply be: Setting up my website. Click the Commit to master button to confirm the commit.
Syncing step 2: publish and sync with your GitHub repository
Once all changes have been added to a commit (if you make additional changes, you can make a new commit), it’s time to sync them with the online copy of your repository which will be hosted on GitHub.
The commit package you just saved will now appear under the History section. When you do this for the first time, you’ll see a Publish button in the top right corner of the app.
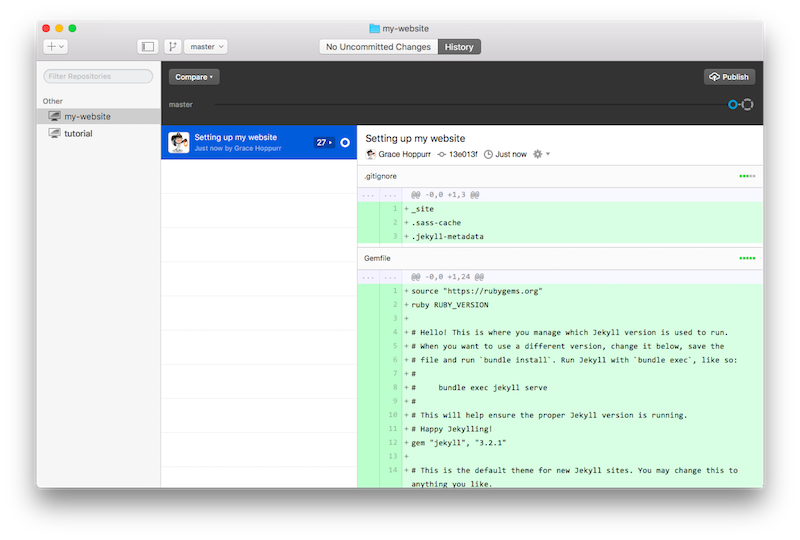
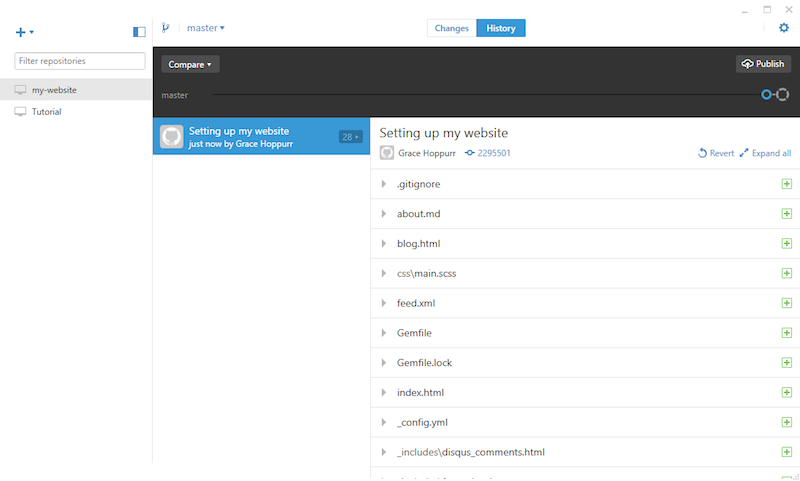
Click the Publish button to continue. After you do this, a window will appear, asking you for a name and description for the repository, as it will appear on GitHub.
It’s important to name the repository for your Jekyll website in the following format: <username>.github.io - but replace the username part with your own GitHub username. For example, if your username was GraceHoppurr, the name of your repository would be GraceHoppurr.github.io.
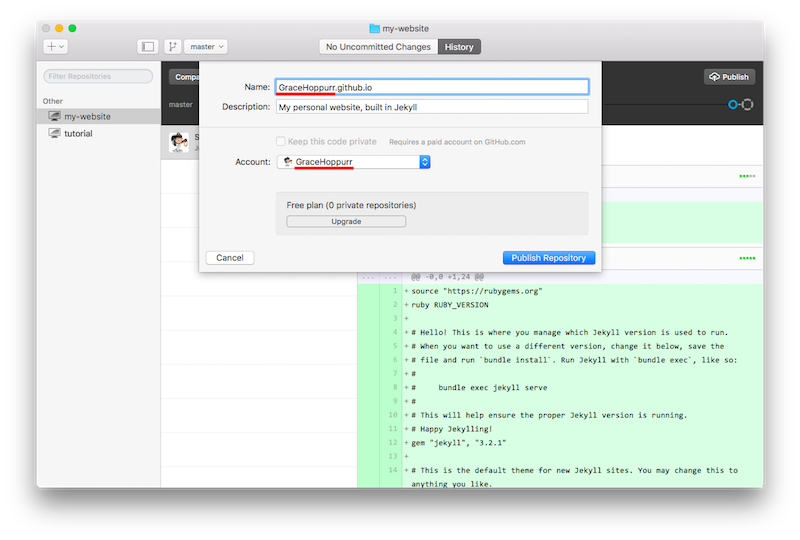
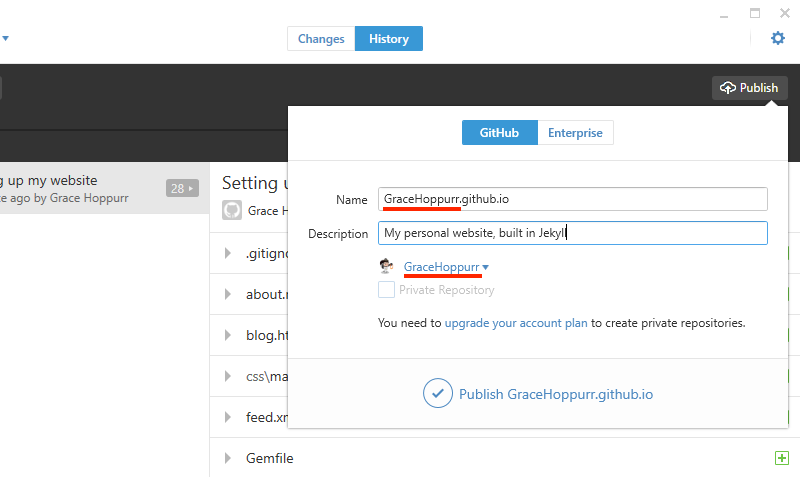
Once you’ve changed that, click the Push RepositoryPublish button.
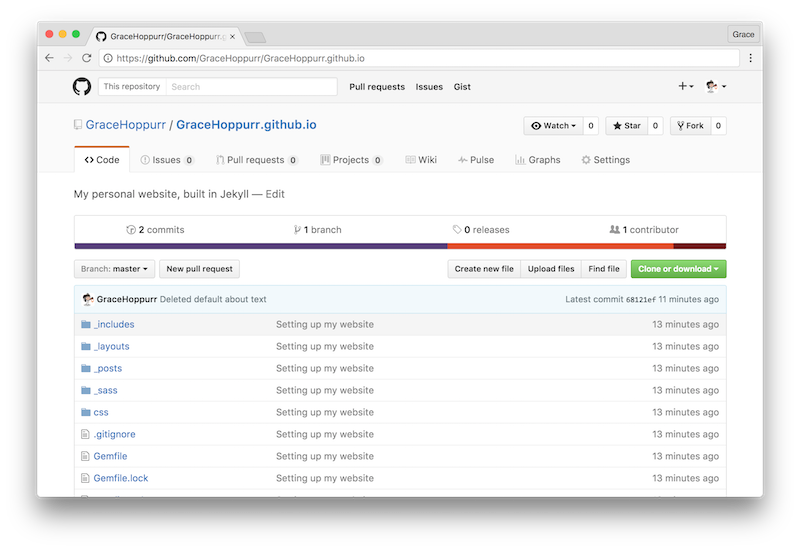
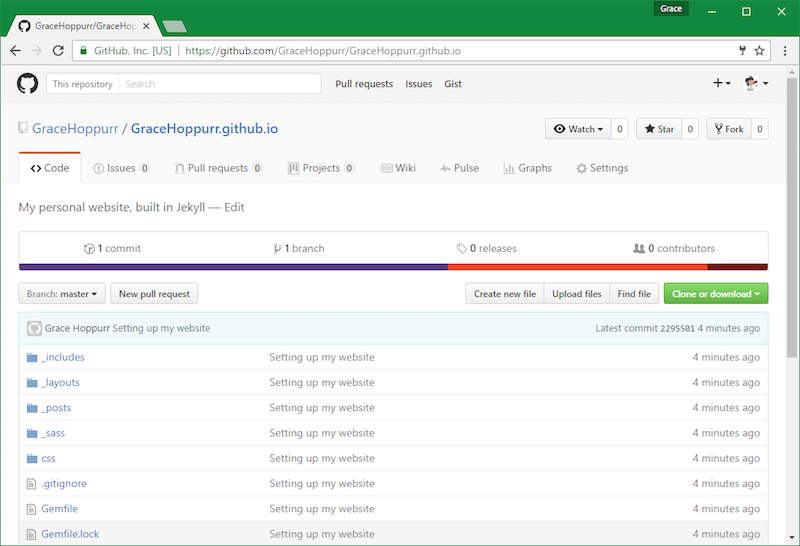
Congratulations! Your website is now on GitHub! Go on, you can check your project’s code at: https://github.com/<username>/<username>.github.io
Remember to replace the <username> part with your own GitHub username, just like Grace did. You’ll see all the files are the same as the files in the project on your computer.
In a few minutes, the website should also be available online, for anyone in the world to visit, at https://<username>.github.io (again, replace the <username> with your own username). Once the website comes online, you can send the link to your friends.
The next time you’ll have changes to commit, you can just click on the Sync button in the top right corner to upload recent changes, but don’t forget to first Commit the changes you want to sync. Your website will also be updated automatically whenever you sync your repository.
What did you learn?
Whew, you now actually published your website online! You set up your GitHub account, and learned how to use the GitHub app to 1.) commit changes and 2.) sync them to an online copy of your project (your GitHub repository). Syncing with your GitHub repository also automatically updates the public copy of your website.In Part 7, you’ll add some images and update your website again.